
你有没有想过,用Python这种强大的编程语言来和以太坊的智能合约来个亲密接触呢?想象你可以在自己的电脑上,轻松地与那些在区块链上运行的合约互动,是不是有点小激动呢?那就让我们一起来看看,如何用Python调用以太坊智能合约,开启这段奇妙的旅程吧!
第一步:搭建环境
在开始之前,你需要准备一些基础工具。首先,确保你的电脑上安装了Python。你需要安装一个以太坊客户端,比如Geth。接下来,安装一个Python的库,叫做web3.py,它是用来与以太坊交互的。
安装Geth:
```bash
下载Geth
wget https://github.com/ethereum/go-ethereum/releases/download/v1.10.25/ethereum-linux-amd64.tar.gz
tar -xvf ethereum-linux-amd64.tar.gz
cd ethereum
./geth --datadir /path/to/your/data
安装web3.py:
```bash
使用pip安装web3.py
pip install web3
第二步:连接到以太坊网络
有了Geth和web3.py,接下来就是连接到以太坊网络了。你可以连接到一个公共网络,比如Ropsten测试网,或者连接到一个私有网络。
连接到Ropsten测试网:
```python
from web3 import Web3
连接到Ropsten测试网
infura_url = 'https://ropsten.infura.io/v3/YOUR_INFURA_PROJECT_ID'
web3 = Web3(Web3.HTTPProvider(infura_url))
检查连接是否成功
if web3.isConnected():
print(\Connected to Ethereum network!\)
else:
print(\Failed to connect to Ethereum network.\)
替换`YOUR_INFURA_PROJECT_ID`为你的Infura项目ID。
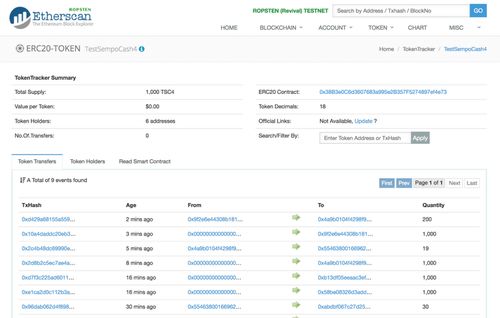
第三步:编写智能合约
现在,你已经连接到了以太坊网络,是时候编写一个简单的智能合约了。这里,我们用Solidity编写一个简单的存储合约。
Solidity合约代码:
```solidity
// SPDX-License-Identifier: MIT
pragma solidity ^0.8.0;
contract SimpleStorage {
uint256 public storedData;
function set(uint256 x) public {
storedData = x;
}
function get() public view returns (uint256) {
return storedData;
}
将这段代码保存为`SimpleStorage.sol`,然后使用Truffle或Remix等工具编译它,并部署到测试网。
第四步:调用智能合约
合约部署后,你可以使用web3.py来调用它。
调用智能合约:
```python
编译合约后,获取合约地址和ABI
contract_address = '0x...' 合约地址
contract_abi = [...] 合约ABI
创建合约实例
simple_storage = web3.eth.contract(address=contract_address, abi=contract_abi)
调用set函数
tx_hash = simple_storage.functions.set(123).transact({'from': web3.eth.defaultAccount})
等待交易完成
tx_receipt = web3.eth.waitForTransactionReceipt(tx_hash)
调用get函数
data = simple_storage.functions.get().call()
print(\Stored data:\, data)
替换`0x...`为你的合约地址,`[...]`为你的合约ABI。
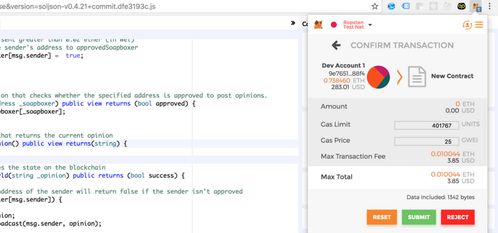
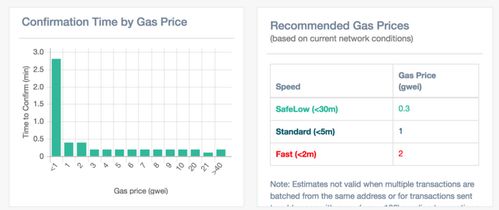
第五步:处理交易
在调用智能合约时,你可能会遇到交易相关的操作。比如,你需要支付交易费(gas)来让以太坊网络处理你的交易。
处理交易:
```python
获取合约的gas信息
gas_price = web3.toWei('50', 'gwei')
gas_estimate = simple_storage.functions.set(456).estimateGas({'from': web3.eth.defaultAccount})
创建交易对象
nonce = web3.eth.getTransactionCount(web3.eth.defaultAccount)
transaction = {
'from': web3.eth.defaultAccount,
'to': contract_address,
'value': 0,
'gas': gas_estimate,
'gasPrice': gas_price,
'data': simple_storage.functions.set(456).encodeABI(),
发送交易
tx_hash = web3.eth.sendRawTransaction(transaction['rawTransaction'])
tx_receipt = web3.eth.waitForTransactionReceipt(tx_hash)
调用get函数
data = simple_storage.functions.get().call()
print(\Stored data:\, data)
这样,你就成功地用Python调用了以太坊智能合约,是不是感觉有点小成就感呢?
通过以上步骤,你不仅学会了如何搭建环境、连接网络、编写合约,还学会了如何调用合约和处理交易。这只是一个开始,以太坊的世界还有很多奥秘等待你去探索。继续加油,未来的区块链开发者!